
Howdy trukkers!
I’ve seen a lot of tournament armies over the years. And an
alarming number of them aren’t painted. When I’ve asked people why they don’t
paint their armies, I get two answers. One is that they simply don’t have time.
And that’s something there’s not really a fix for. The other, and far more common one I hear, is
that people don’t feel like they’re good at painting, so they simply don’t do
it. And that’s something we CAN fix. Each week, I’m going to post a hobby article
geared towards getting fast, quality results using only basic techniques.
This week, I’m going to focus on skin tones and faces. This
is something that a lot of hobbyists struggle with because it involves very
fine detail and shading and subtle color transitions to get a realistic effect.
I use Reaper Master Series (RMS) paints with a few Games Workshop
(GW) and Vallejo Model Color (VMC) paints thrown in. There’s a handy conversion
guide for the colors you can use here-
The most important thing with paint is not to focus on
the name—a lot of guides say you need a
specific branded color—like you MUST use Ultramarines Blue on Ultramarines,
etc. But the actual color of the paint is what really matters, so eyeballing
something comparable is a far better bet if you don’t have the actual color any
guide, whether it be from me, Games Workshop, Privateer Press, or someone else
on the internet calls for.
So to get started, I prime the model, and when that’s dry, I
apply a layer of RMS Rosy Shadow. This is very much the basecoat, and hardly
any of this will show in the finished product. Next, I apply a wash of GW Ogryn
Flesh (I happened to stock up before the new paint range came out. Reikland
Fleshshade will do just fine now). This does some initial shading, and shows
all the details of the face, which is crucial to putting highlights in the correct
places. I tend to view this all as one step, because this is the preparation
necessary to begin on any area of Caucasian flesh tone, regardless of whether
it’s the face or elsewhere.
Now, I start adding highlights. I add a layer of RMS Rosy
Skin, avoiding the recesses, or low points of the model. I take great care to
avoid the eyes, and if the mouth is open, the mouth.
I now dot the eyes with black. If the mouth is open, I line
in the mouth with black also to clean up from the previous steps.
I now apply a mix of RMS Rosy Skin and Rosy Highlight. The
important thing here is to leave some of the previous layers showing.
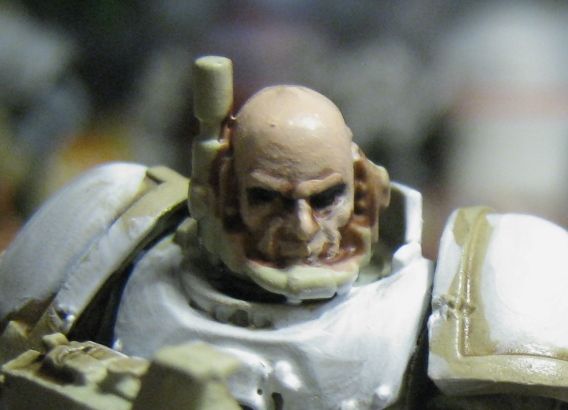
Now, I use Fair Skin on its own and apply highlights
specifically to the bridge of the nose, brows, and cheeks. This is a subtle step that sharpens the
detail, without significantly altering the overall coloration.

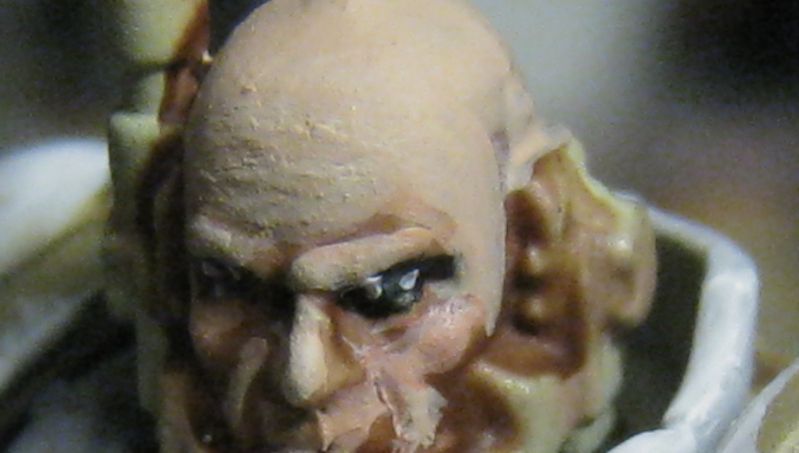
Now’s the tricky part. Using the finest tipped brush you’ve
got (that doesn’t necessarily mean smallest, just the sharpest—I happened to
use a GW large brush for this!) dot the corners of each eye with white. You
want to leave a black outline to define the eye here. If you mess up, just
paint the whole eye black and try again. This step takes a lot of practice to
get right, so don’t worry if it takes you a few tries!
You can stop here if you want—all that’s really left is to
clean up around the face and add the details surrounding the head. The
techniques following involve some very subtle effects and precision work, so if
you’re after getting models on the table, you can skip the remainder of this.
But, if you want to challenge yourself and push your painting to its limits, the
next few steps aren’t that time consuming—they’re just tricky. For the
remainder of these steps, you’ll need a very steady hand and the same sharp
pointed brush you used for the eyes.
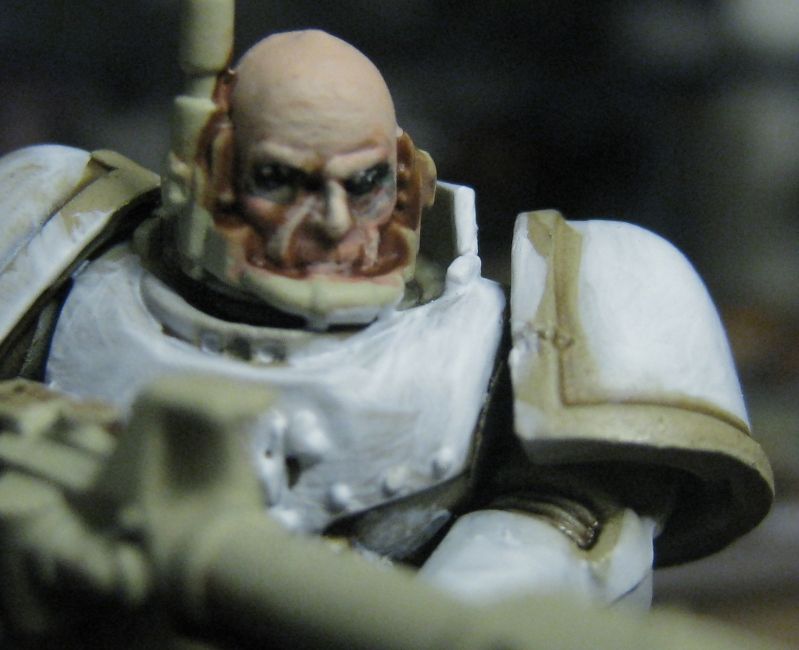
Now, let’s bring the face to life, like what you see in
Golden Daemon winning models. I take a bit of GW Bloodletter, which is the red
glaze, thin it a bit using glaze medium rather than water. This helps control
where it goes and keeps it out of the recesses. I then apply just a tiny bit to
the cheeks and lips, and just above the brow, almost in the recess. This is a very subtle effect, but it adds some warmth to
the skin tone in places you would see it on a real person.
If you look at a real person’s eyes, there’s usually a
slight shadow beneath them. Flesh tone paints often have a mix of pink and
orange pigments in them, so we’re going to apply a little color theory here to
get a shadow. This is such a fine scale that the obvious use of a grey to
create a shadow doesn’t work—we have to play around with how the light actually
interacts with the pigment. Long story short, we’re after Games Workshop’s
Coelia Greenshade wash—it’s a dark teal. Now, we’re going to mix up a bit of it
on the palette in a 80% Glaze Medium to 20% wash ratio—this should be extremely
thin, but it should also stick right to where you want it and not flow into
recesses.
Finally, on bald models such as this, you have a choice—you can
either assume they are naturally bald, or you can give them the appearance of
having a shaved head. The former requires no work, but the latter is painfully
simple. All you need is to mix up some GW Dawnstone and Glaze Medium in about a
60-40 mix favoring the glaze medium. Then, you just draw the area that’s been
shaved onto the skin, and fill it in. It will be translucent enough to show the
skin tone through, but still give the appearance of stubble. This works for
beards, as well. You may have to apply more than one layer to get the desired
effect.
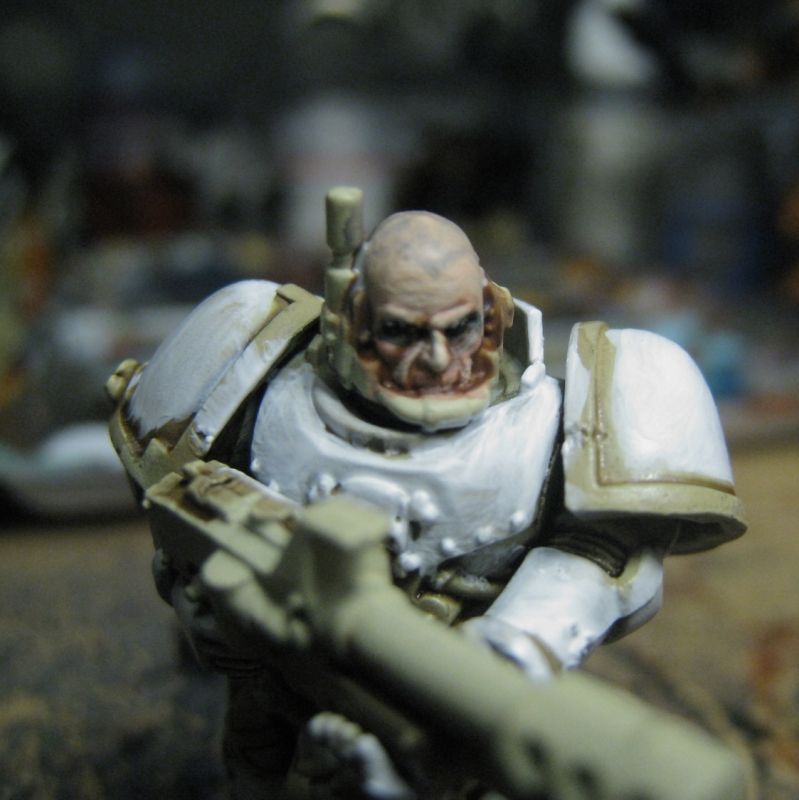
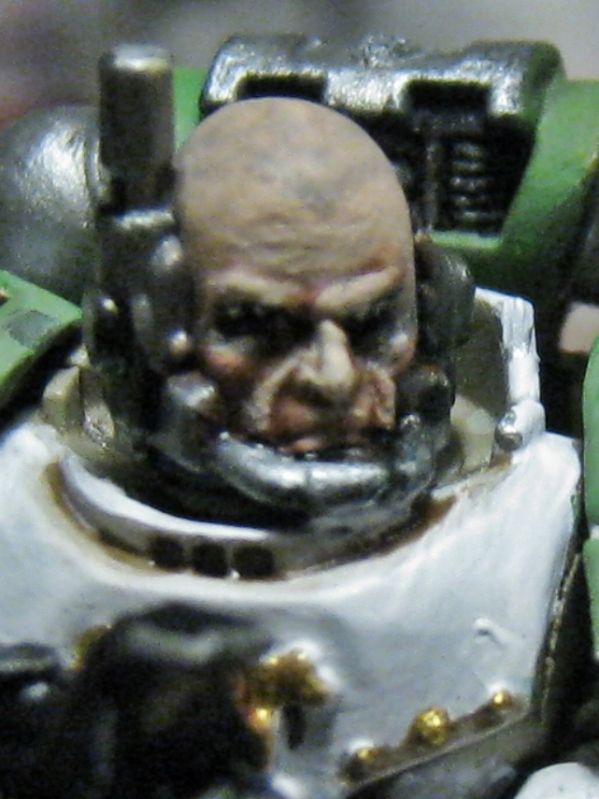
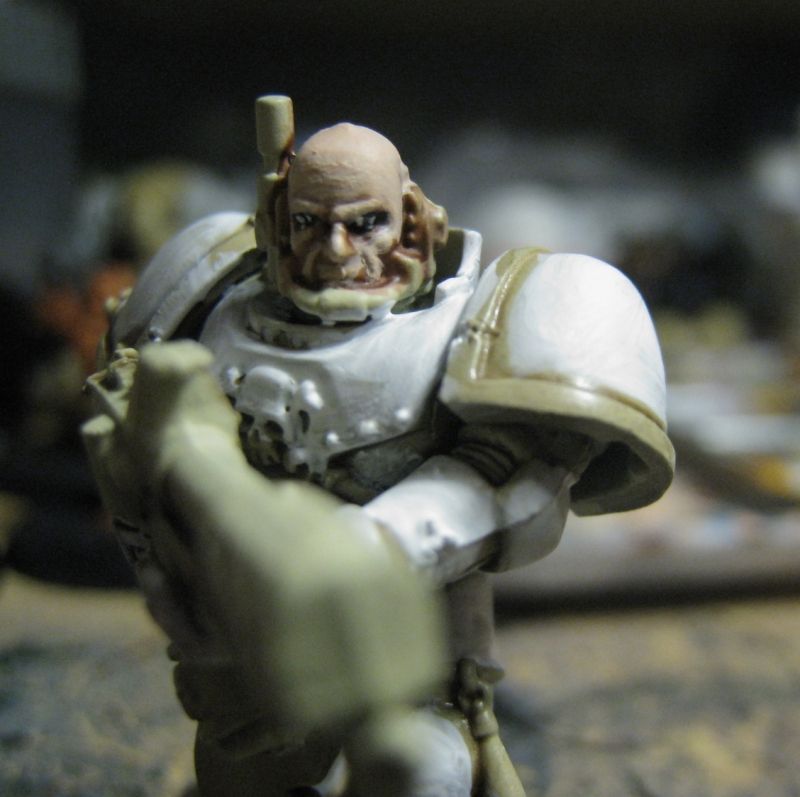
After doing all the details around the face, this is the
finished product. Note that the rest of this model is –not- finished-- the armor and details have a fair bit more work involved. I just
sort of threw some paint on it to show more or less what the face looks like
when it’s all together. I hope this guide has been useful! Stay tuned for more
hobby goodness!
-The Son of Horus
No comments:
Post a Comment